
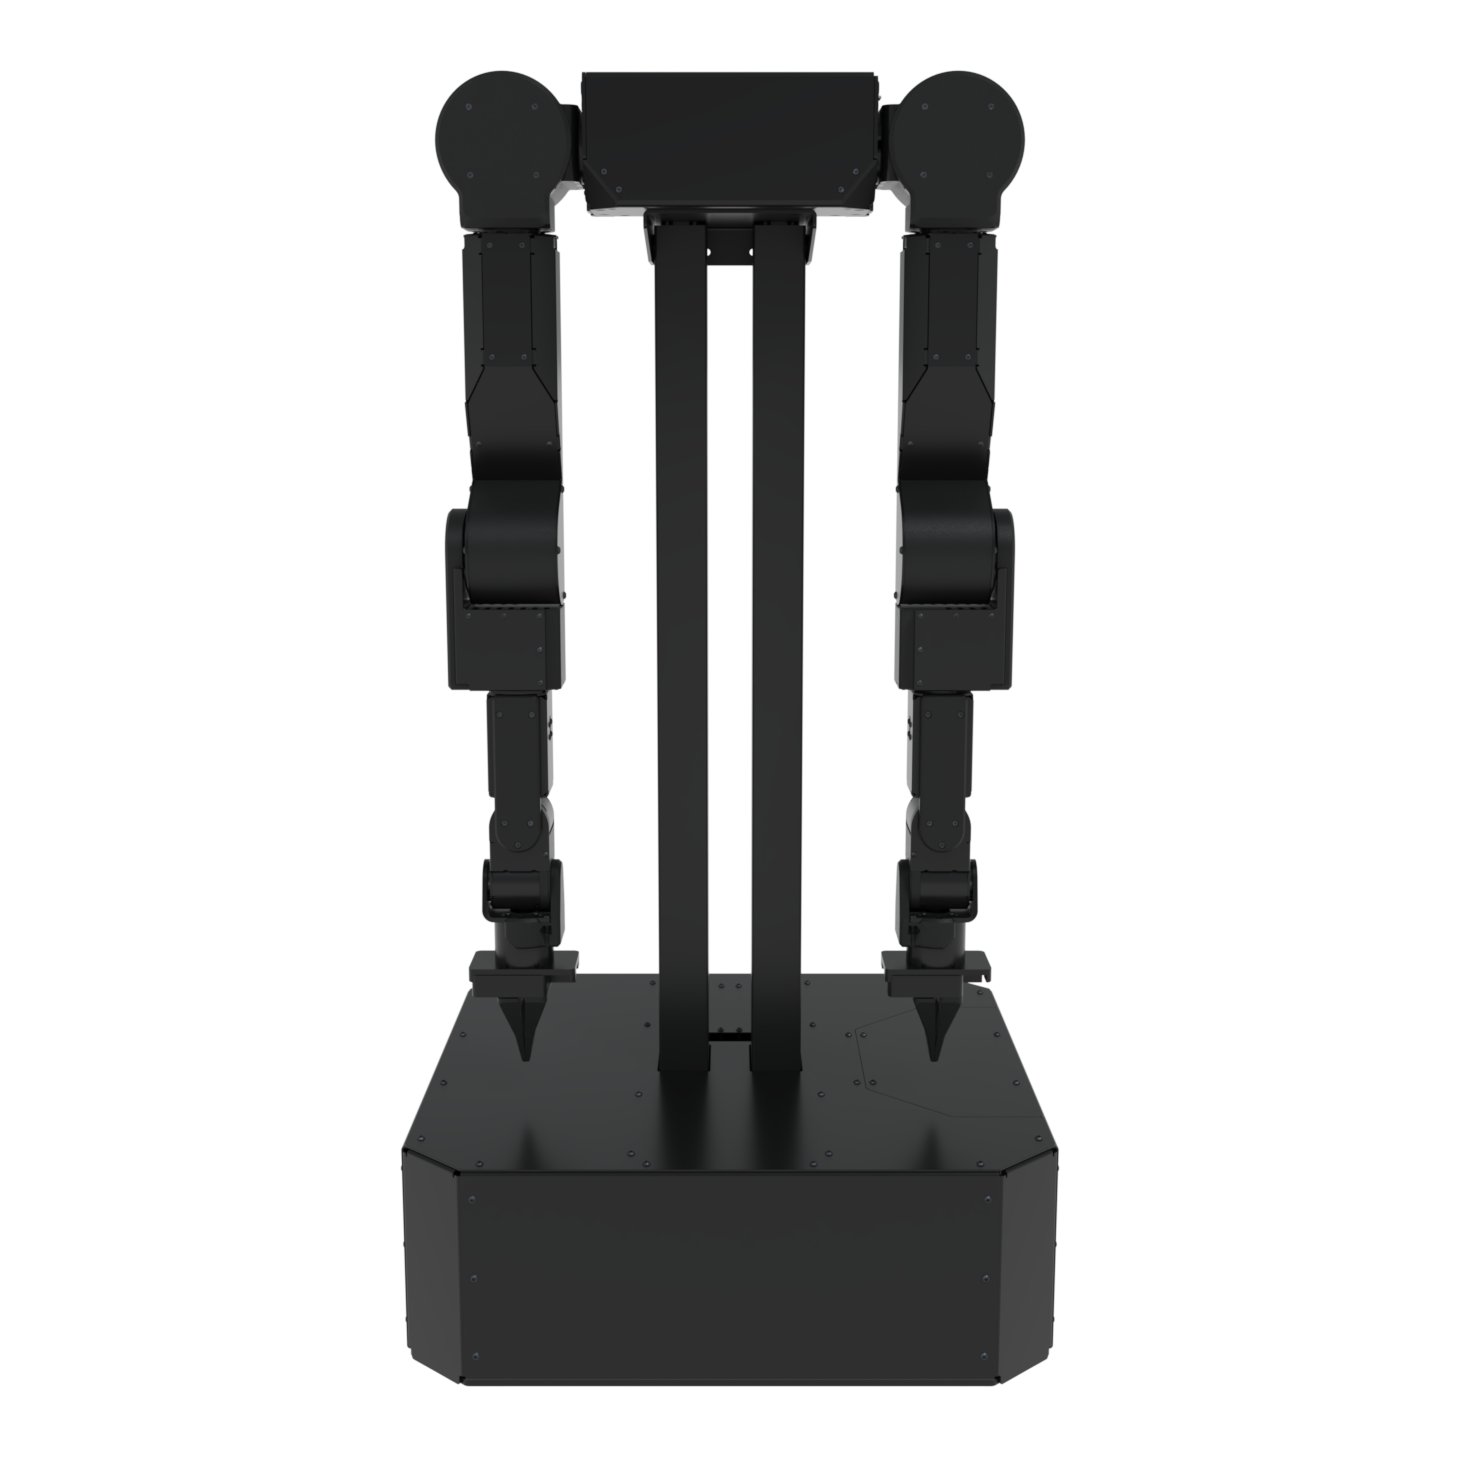
Tools required
You’ll need a hex (Allen) key for the M8 bolts that mount Axol, and a Torx driver for the bolts that mount the compute (M6 or M3, depending on which one you have):Power panel
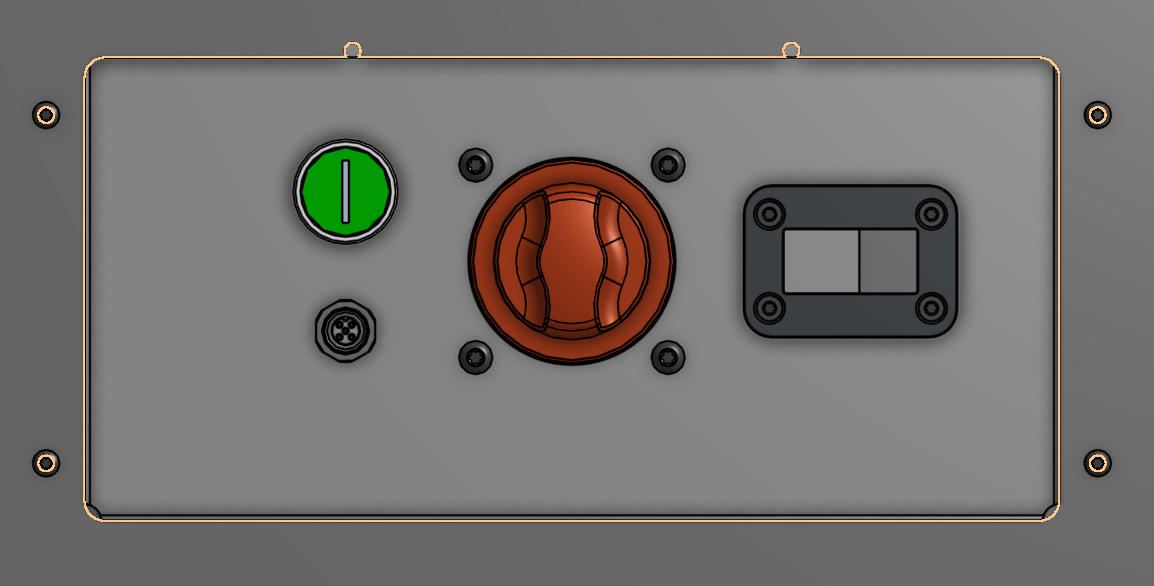
- Green on-switch: starts Jelly once the power switch is on and the E-Stop is disengaged.
- E-Stop connector (below the on-switch): plug the E-Stop in here. Keep it somewhere the operator can reach.
- Red power switch: the main power switch. Turn it off to fully de-energize the base.
- Anderson connector: the charge port. See Charging Jelly.
Abruptly shutting down the Jetson can sometimes corrupt the OS. Shut it down from the OS first, then turn the red power switch off.
Assembling Jelly
1
Unbox
Set Jelly on a level floor with room to work around it.
2
Attach the cable chain
The cable chain that carries Axol’s cables up the lift column may ship with its top end loose for transport. If so, fasten the top bracket of the chain to the top plate so the chain follows the lift as it moves.
3
Mount the compute
Install the Compute Kit in the base compartment as described in Mounting the compute below.
4
Power on
Plug the E-Stop into its connector on the power panel above and make sure it is disengaged, turn the red power switch on, then press the green on-switch. The compute in the base boots with it.
5
Raise the lift to install height
Run
axol lift.goto. Its default target of 75% is the robot install height, comfortable for sliding Axol onto the mounting plate. The lift ships homed, so there is no calibration to run first.6
Mount Axol
Follow Mounting Axol below: four M8×12 bolts with locking washers, threaded in from underneath the plate.
7
Connect Axol
Plug the XT90 power lead and USB-C control cable into the back of Axol. Then fit the cameras with the Axol Cameras guide. Their GMSL cables are already connected at the compute end.
8
Drive
Drive the base and lift from the headset thumbsticks during teleop. See Jelly in the VR interface guide.
Mounting the compute
1
Mount the compute
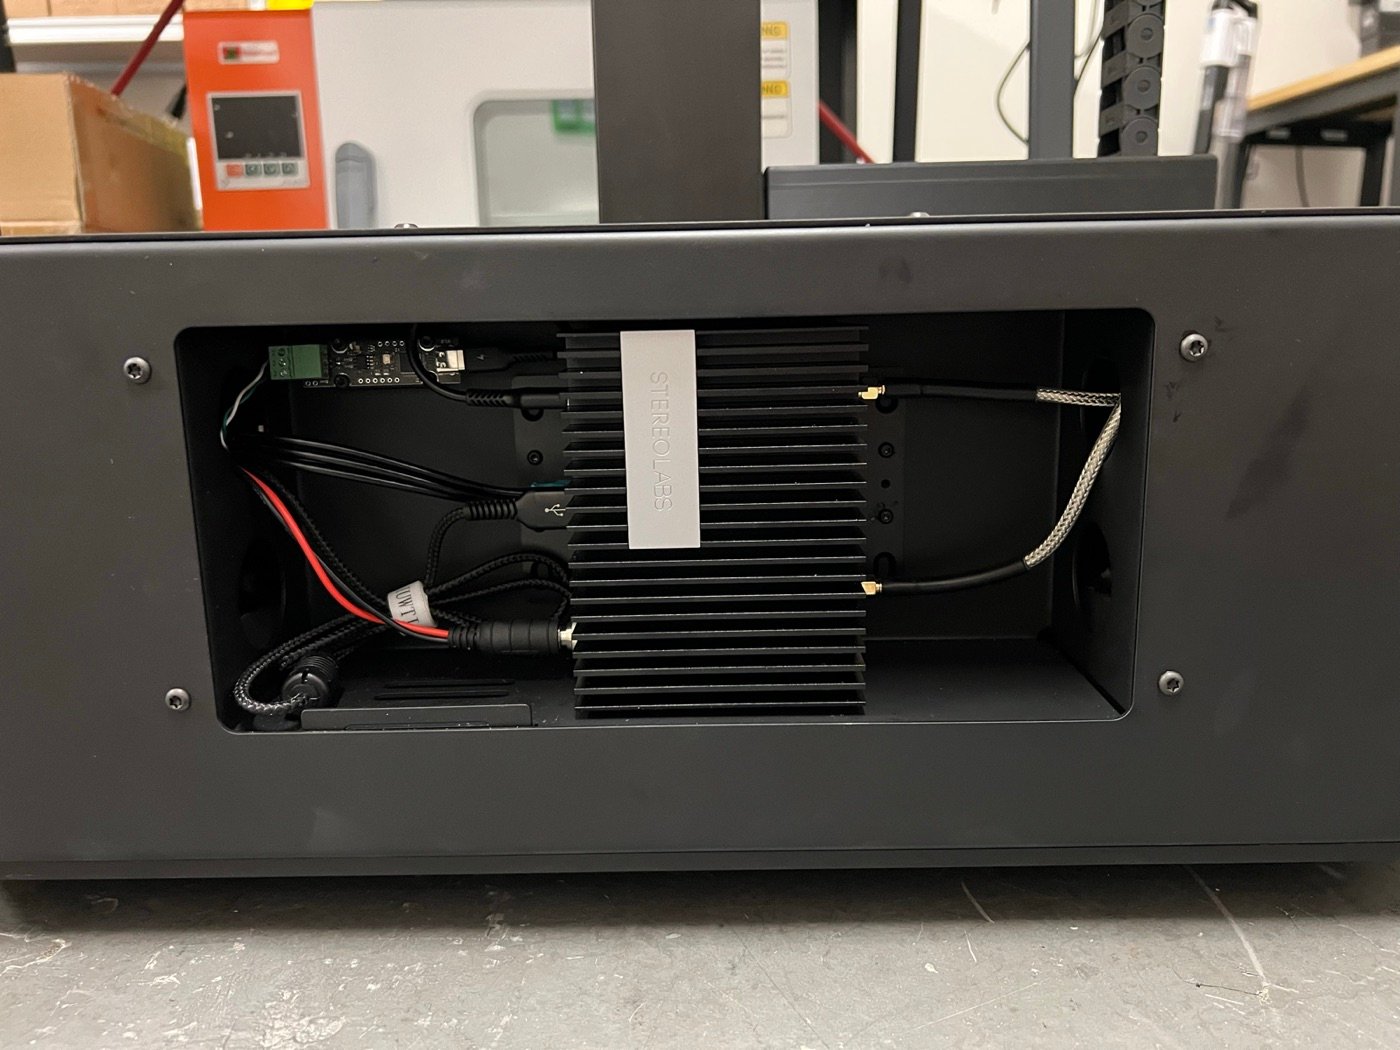
Fasten the compute into the base compartment using the mounting brackets that come with it, heatsink fins facing out so it can breathe. The bolts depend on which compute you have:
- ZED Box Orin: 4× M3×12 Torx bolts (T10).
- Jetson AGX Orin: 4× M6×12 Torx bolts (T30).
2
Connect power, CAN, and antennas
Plug the compartment’s 19V, 5A DC power lead into the compute’s power input, the wheel and lift USB-to-CAN adapters into its USB ports, and the two antenna cables onto the compute’s antenna connectors.
3
Connect Axol and the cameras
Plug Axol’s USB-C control cable into a USB port on the compute and the GMSL cables into its GMSL2 inputs.
Mounting Axol
Axol attaches to its mounting plate with four M8×12 bolts and their locking washers, threaded in from underneath. See the mounting holes diagram for hole positions.1
Gather the hardware
Have the four M8×12 bolts and locking washers ready, along with a 6 mm hex key.
2
Place Axol on the mount
With two people, lift Axol and set it on the mount, aligning its mounting holes with the holes in the mounting plate.
3
Insert the bolts from below
From underneath the mounting plate, pass each M8×12 bolt (with its locking washer) up through the plate and into Axol’s mounting holes.
4
Tighten
Tighten all four bolts with the 6 mm hex key to lock Axol in place.
Charging Jelly
Jelly runs from a 2.4 kWh battery good for 4 to 10 hours depending on how much you drive and lift. It charges through the Anderson connector on the power panel, using the charger in the box.1
Power off
Stop driving, shut the Jetson down from the OS, then turn the red power switch off. The lift holds its position unpowered, so it can stay wherever it is.
2
Connect the charger
Plug the charger into a wall outlet, then into the Anderson connector on the power panel.
3
Wait for full
Leave it connected until the charger reports full. Unplug the charger before powering Jelly back on.
Next steps
Axol Cameras
Mount the Camera Kit’s wrist and head cameras and wire them to the compute.
Installation
Install Axol on the robot machine and open the web control panel.
Hardware Setup
Back to the setup guides for every configuration.