> ## Documentation Index
> Fetch the complete documentation index at: https://docs.almond.bot/llms.txt
> Use this file to discover all available pages before exploring further.
# Hardware Guide
> Overview and setup guide for Axol.
Axol is configured at order time from three choices:
* **Axol** — The dual-arm robot. Every configuration starts here.
* **Mounting** — Standalone (bolt Axol to your own table or fixture), the **Axol Mount** (rigid table/fixture column), or the **Axol Cart** (height-adjustable mobile cart).
* **Perception Kit** (optional) — Head and wrist cameras plus the compute needed to run Axol.
## Axol Overview
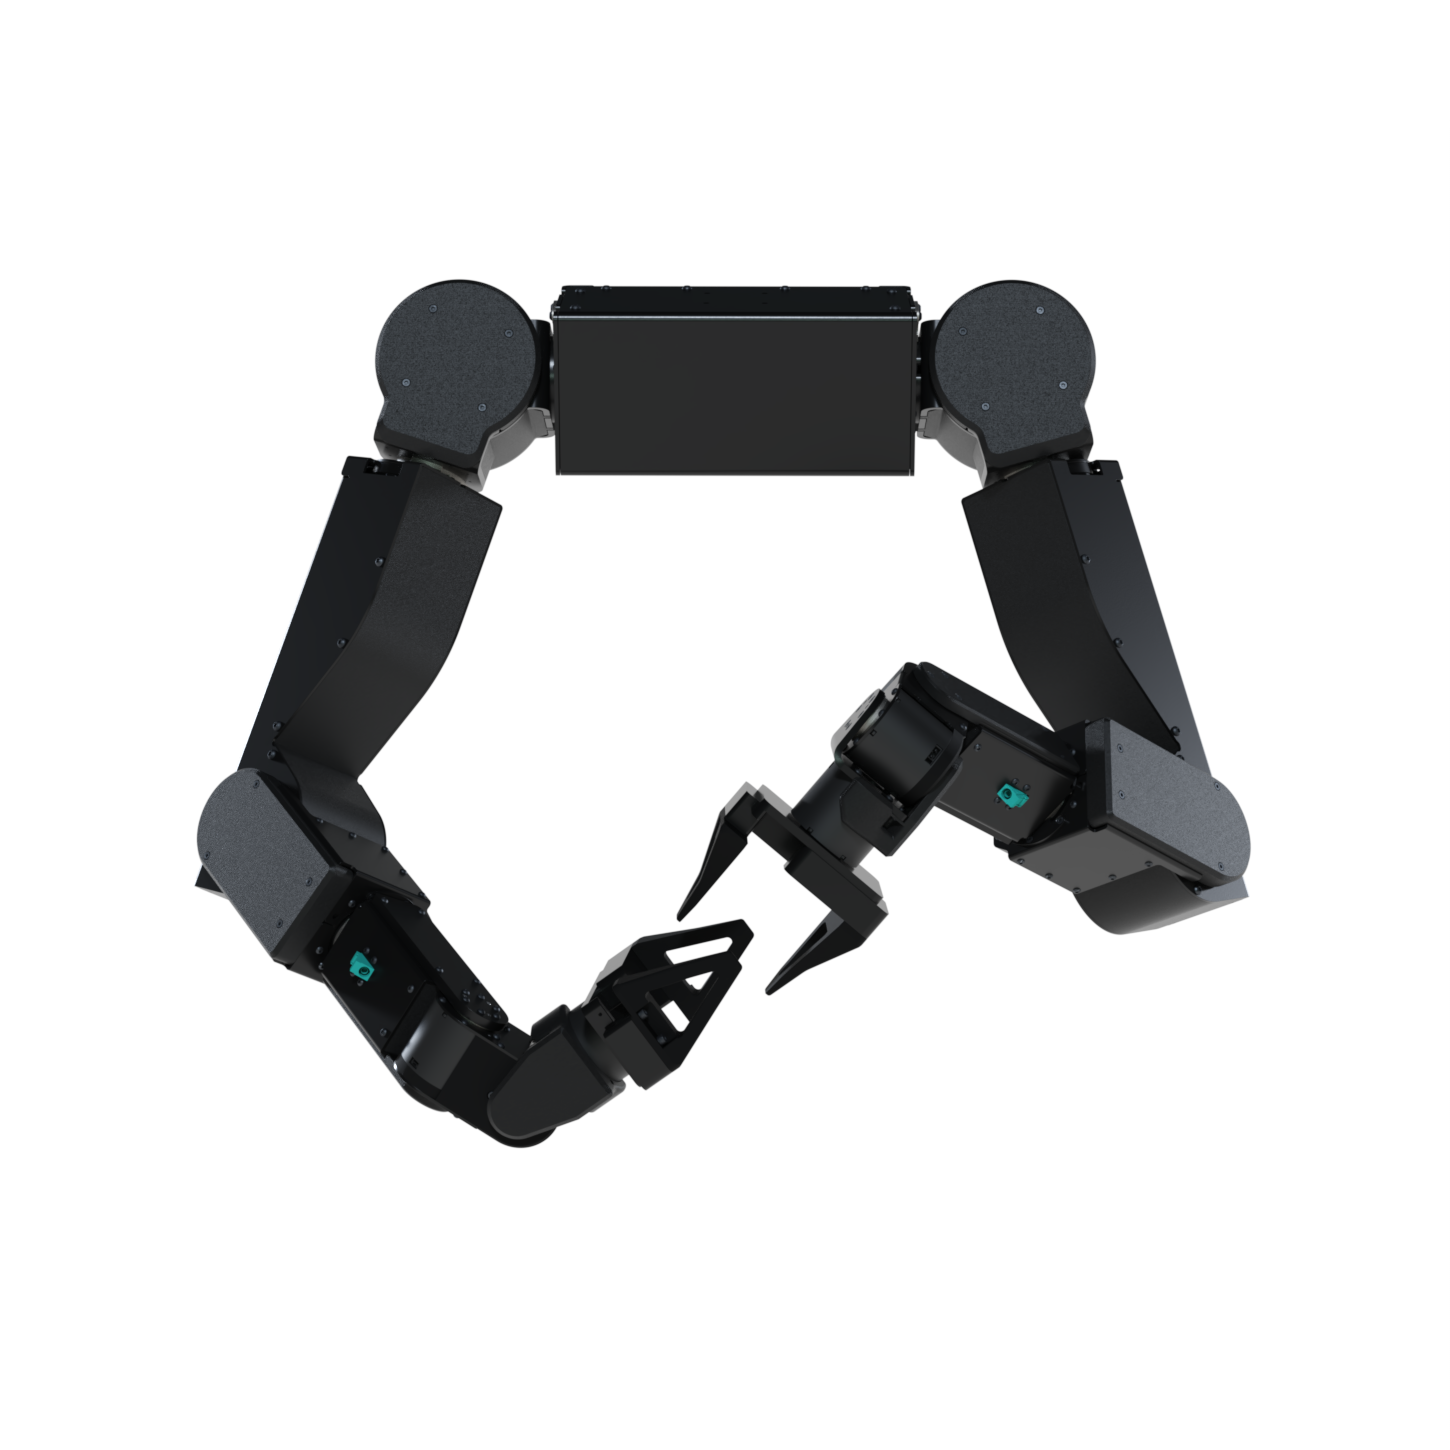 Axol ships fully assembled and ready to mount. It attaches with four **M8×12 bolts** that thread in from the bottom — see the [mounting holes diagram](#reference-diagrams) below.
The back of the robot exposes the connectors used for power and camera control:
* **2× GMSL2 ports** for the wrist cameras.
* **1× XT90 connector** for power.
* **1× Locking USB-C connector** for control.
### Reference diagrams
* [Mounting holes](https://www.almond.bot/resources/axol_mounting_holes.pdf) (PDF)
* [Gripper drawing](https://www.almond.bot/resources/gripper.pdf) (PDF)
* [Gripper CAD model](https://www.almond.bot/resources/gripper.step) (STEP)
## Axol Mount Overview
Axol ships fully assembled and ready to mount. It attaches with four **M8×12 bolts** that thread in from the bottom — see the [mounting holes diagram](#reference-diagrams) below.
The back of the robot exposes the connectors used for power and camera control:
* **2× GMSL2 ports** for the wrist cameras.
* **1× XT90 connector** for power.
* **1× Locking USB-C connector** for control.
### Reference diagrams
* [Mounting holes](https://www.almond.bot/resources/axol_mounting_holes.pdf) (PDF)
* [Gripper drawing](https://www.almond.bot/resources/gripper.pdf) (PDF)
* [Gripper CAD model](https://www.almond.bot/resources/gripper.step) (STEP)
## Axol Mount Overview
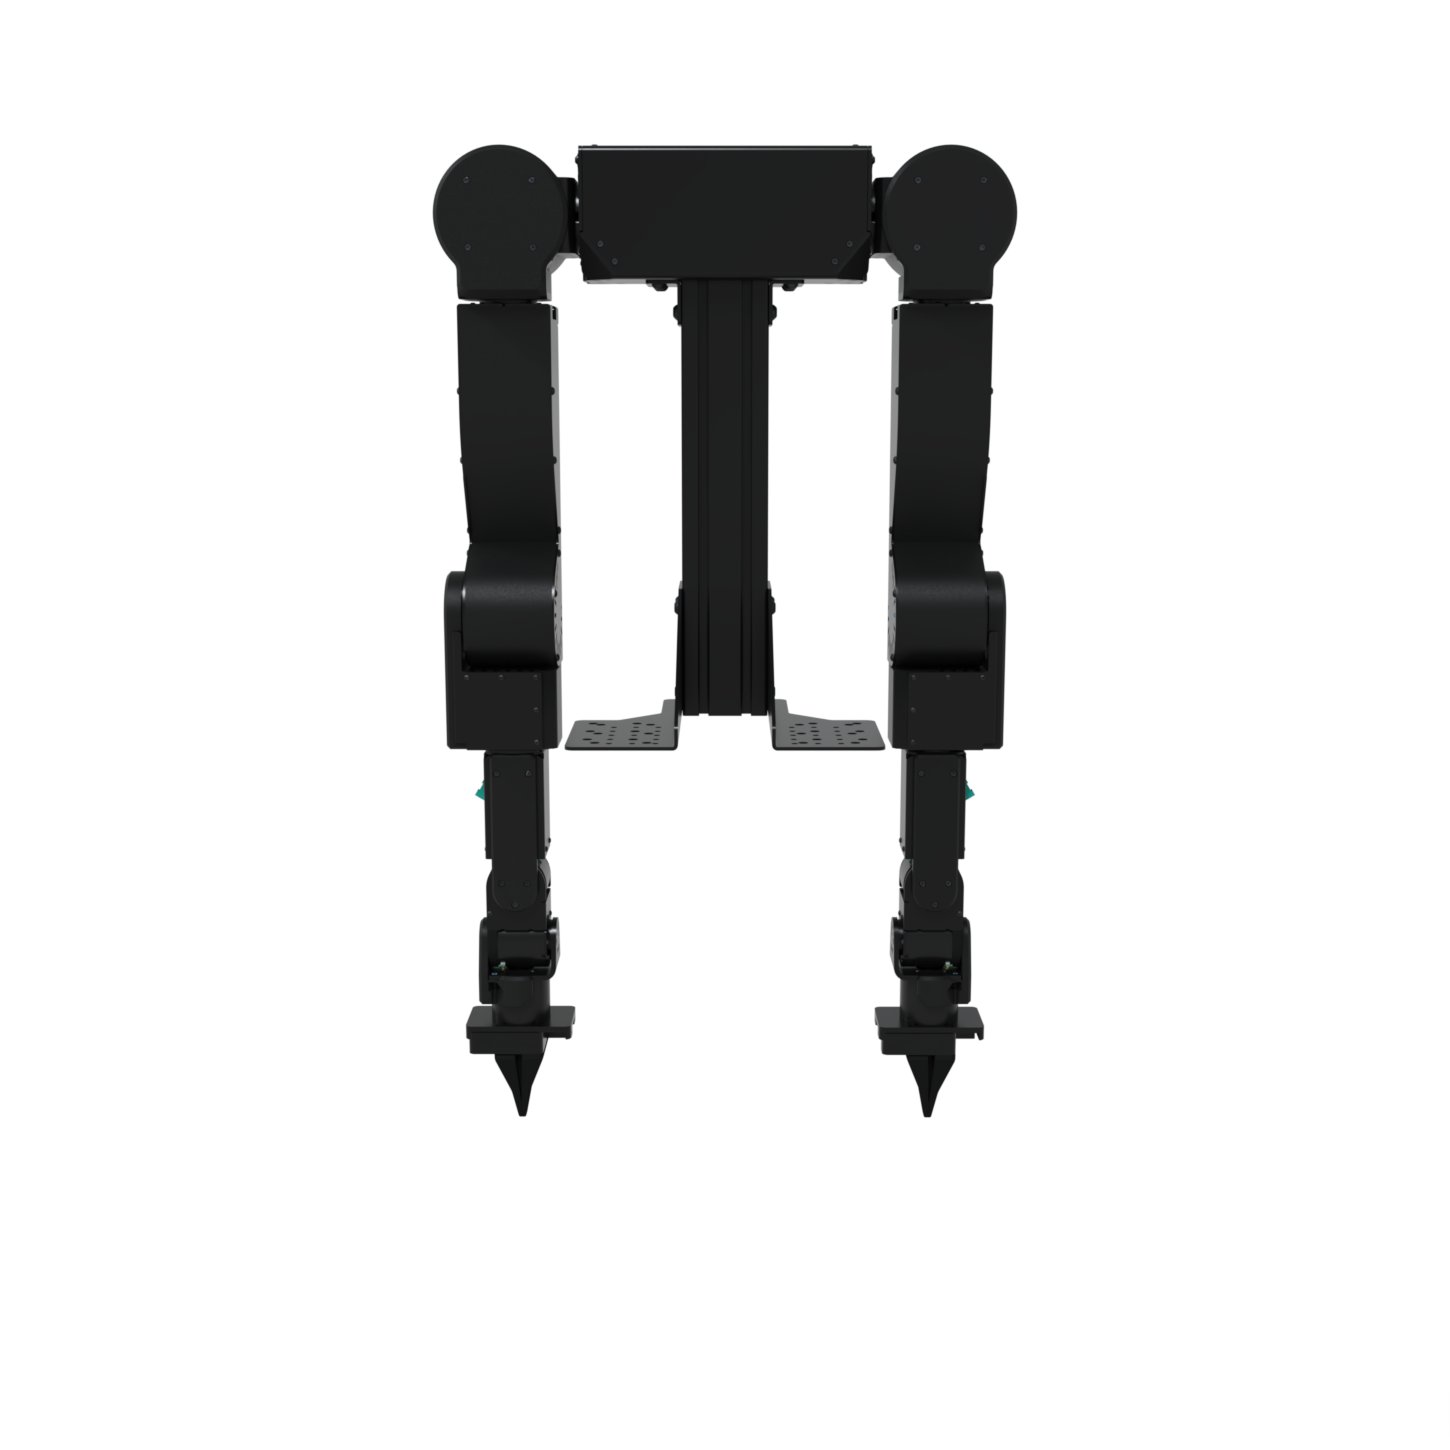 The Axol Mount is a rigid **400mm 8080 aluminum T-slot extrusion column** that bolts Axol to a table, workbench, or fixture. Its base brackets include clearance holes for **2020, 4040, and 4545** extrusion patterns, so it drops onto most T-slot tables without drilling, and the column's T-slots stay free for cable management and accessories. An Axol mounting plate and all table/fixture hardware are included.
### Reference diagrams
* [Mount drawing](https://www.almond.bot/resources/static_mount.pdf) (PDF)
## Axol Cart Overview
The Axol Mount is a rigid **400mm 8080 aluminum T-slot extrusion column** that bolts Axol to a table, workbench, or fixture. Its base brackets include clearance holes for **2020, 4040, and 4545** extrusion patterns, so it drops onto most T-slot tables without drilling, and the column's T-slots stay free for cable management and accessories. An Axol mounting plate and all table/fixture hardware are included.
### Reference diagrams
* [Mount drawing](https://www.almond.bot/resources/static_mount.pdf) (PDF)
## Axol Cart Overview
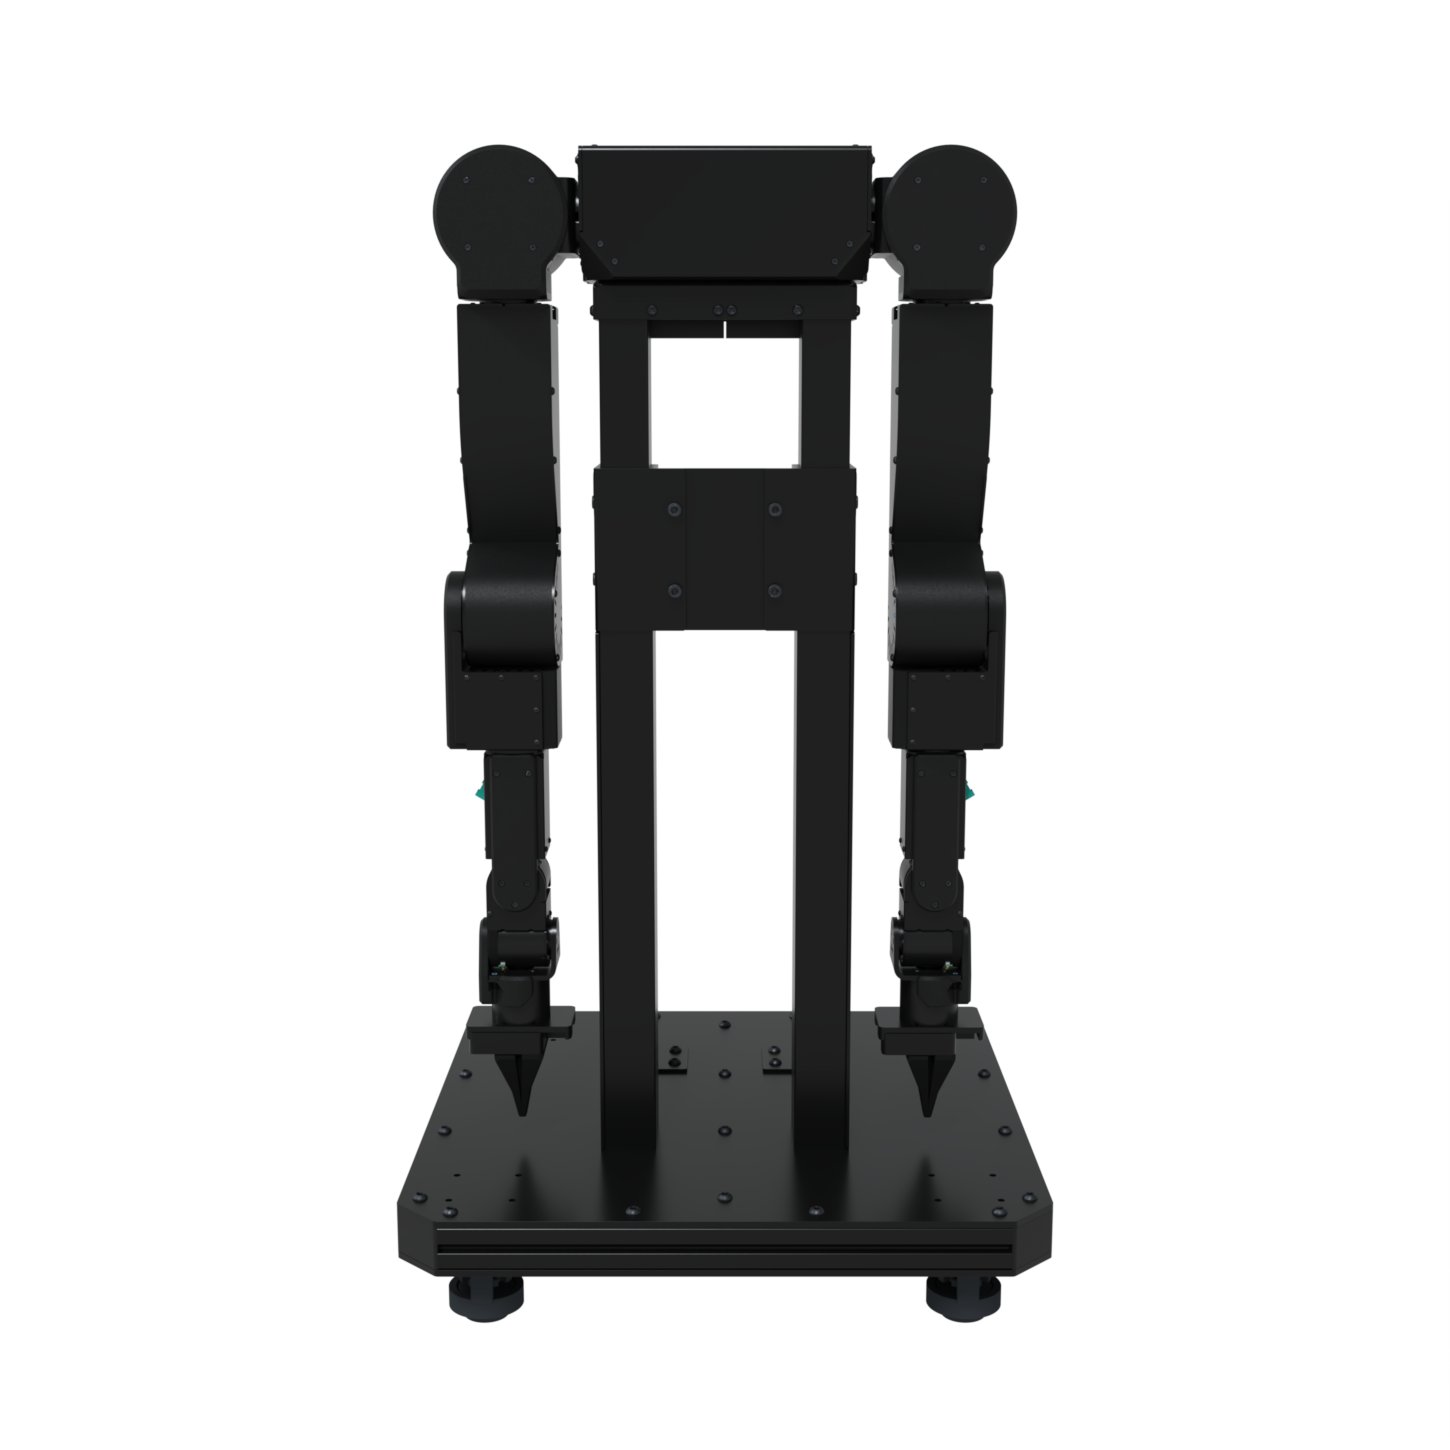 The Axol Cart is a height-adjustable mobile cart with **leveling casters** and a **manual lift**, so you can roll the robot between workstations, lock it in place, and set it to a comfortable working height. Its **60x60cm footprint** fits through standard doors, and T-slot mounting keeps it easy to customize.
## Perception Kit Overview
The Axol Cart is a height-adjustable mobile cart with **leveling casters** and a **manual lift**, so you can roll the robot between workstations, lock it in place, and set it to a comfortable working height. Its **60x60cm footprint** fits through standard doors, and T-slot mounting keeps it easy to customize.
## Perception Kit Overview
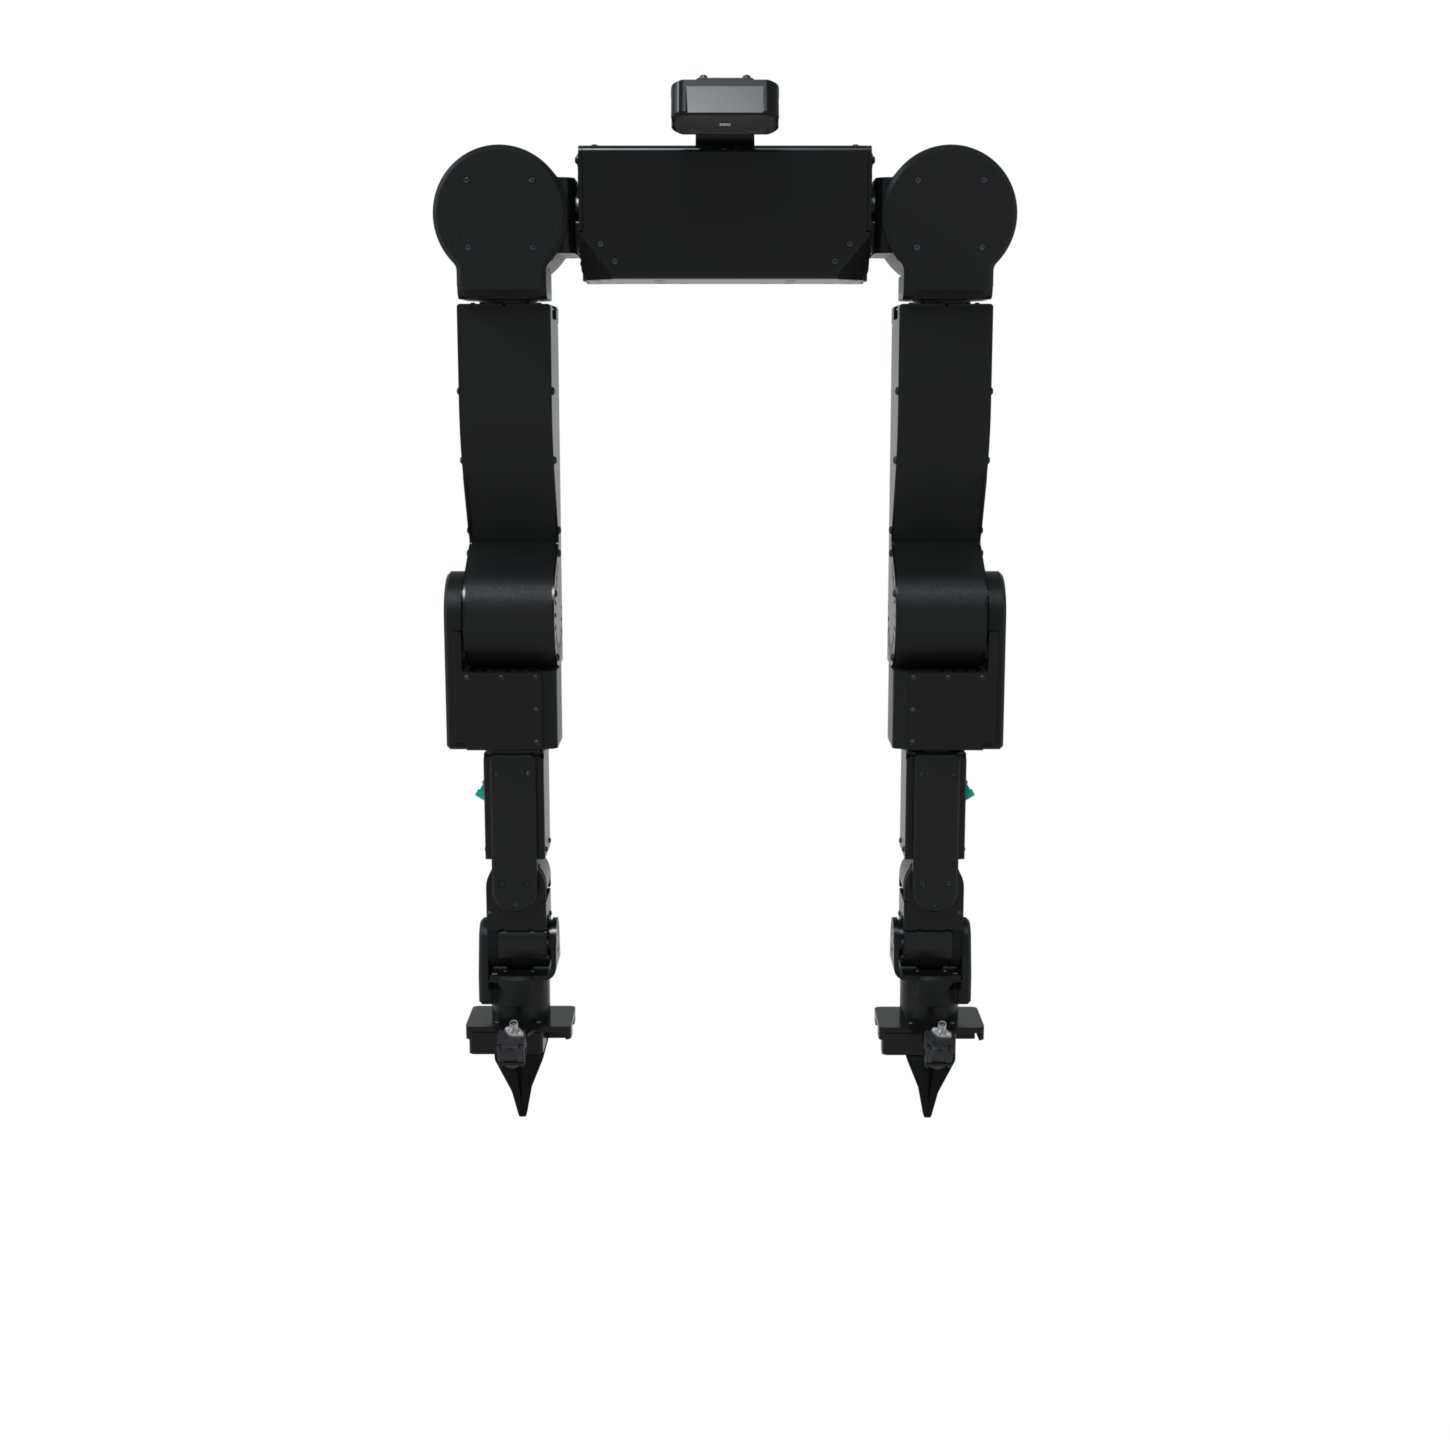 The Perception Kit adds the cameras and compute for data collection and policy inference:
* **2× ZED X One S** wrist cameras with wrist mounts.
* **1× ZED X Mini** head camera with a head mount.
* **1× ZED Box Orin NX 16GB** for onboard compute.
* **FAKRA GMSL2 cabling** for all three cameras.
### Reference diagrams
* [Wrist Mount](https://www.almond.bot/resources/wrist_mount.step) (STEP)
* [Head Mount](https://www.almond.bot/resources/head_mount.step) (STEP)
## Installation
Setting up your Axol configuration.
#### Tools required
You'll need hex (Allen) keys for the socket head cap screws used throughout:
| Screw | Hex key |
| ----- | ------- |
| M8 | 6 mm |
| M4 | 3 mm |
| M3 | 2.5 mm |
| M2 | 1.5 mm |
### Mounting Axol
Axol mounts to the Axol Mount, the Axol Cart, or your own fixture with four **M8×12 bolts** and their **locking washers**, threaded in from underneath. See the [mounting holes diagram](#reference-diagrams) for hole positions.
We recommend using **two people** to lift and place it on the mount.
Have the four **M8×12 bolts** and **locking washers** ready, along with a **6 mm hex key**.
With two people, lift Axol and set it on the mount, aligning its mounting holes with the holes in the mounting plate.
From underneath the mounting plate, pass each M8×12 bolt (with its locking washer) up through the plate and into Axol's mounting holes.
Getting the bolts to catch the threads can be tricky. Gently **wiggling Axol** as you start each bolt helps align the holes and lets the threads bite.
Tighten all four bolts with the 6 mm hex key to lock Axol in place.
### Mounting the cameras
This section applies to configurations with the **Perception Kit**.
Before mounting each camera, scan the **QR code on the back** to grab its serial ID and note down which camera goes where (left wrist, right wrist, head). You'll need this mapping later to match each camera ID to its position.
#### Wrist cameras
Fasten each wrist camera to its mount with 4x **M2×8 screws**.
The Perception Kit adds the cameras and compute for data collection and policy inference:
* **2× ZED X One S** wrist cameras with wrist mounts.
* **1× ZED X Mini** head camera with a head mount.
* **1× ZED Box Orin NX 16GB** for onboard compute.
* **FAKRA GMSL2 cabling** for all three cameras.
### Reference diagrams
* [Wrist Mount](https://www.almond.bot/resources/wrist_mount.step) (STEP)
* [Head Mount](https://www.almond.bot/resources/head_mount.step) (STEP)
## Installation
Setting up your Axol configuration.
#### Tools required
You'll need hex (Allen) keys for the socket head cap screws used throughout:
| Screw | Hex key |
| ----- | ------- |
| M8 | 6 mm |
| M4 | 3 mm |
| M3 | 2.5 mm |
| M2 | 1.5 mm |
### Mounting Axol
Axol mounts to the Axol Mount, the Axol Cart, or your own fixture with four **M8×12 bolts** and their **locking washers**, threaded in from underneath. See the [mounting holes diagram](#reference-diagrams) for hole positions.
We recommend using **two people** to lift and place it on the mount.
Have the four **M8×12 bolts** and **locking washers** ready, along with a **6 mm hex key**.
With two people, lift Axol and set it on the mount, aligning its mounting holes with the holes in the mounting plate.
From underneath the mounting plate, pass each M8×12 bolt (with its locking washer) up through the plate and into Axol's mounting holes.
Getting the bolts to catch the threads can be tricky. Gently **wiggling Axol** as you start each bolt helps align the holes and lets the threads bite.
Tighten all four bolts with the 6 mm hex key to lock Axol in place.
### Mounting the cameras
This section applies to configurations with the **Perception Kit**.
Before mounting each camera, scan the **QR code on the back** to grab its serial ID and note down which camera goes where (left wrist, right wrist, head). You'll need this mapping later to match each camera ID to its position.
#### Wrist cameras
Fasten each wrist camera to its mount with 4x **M2×8 screws**.
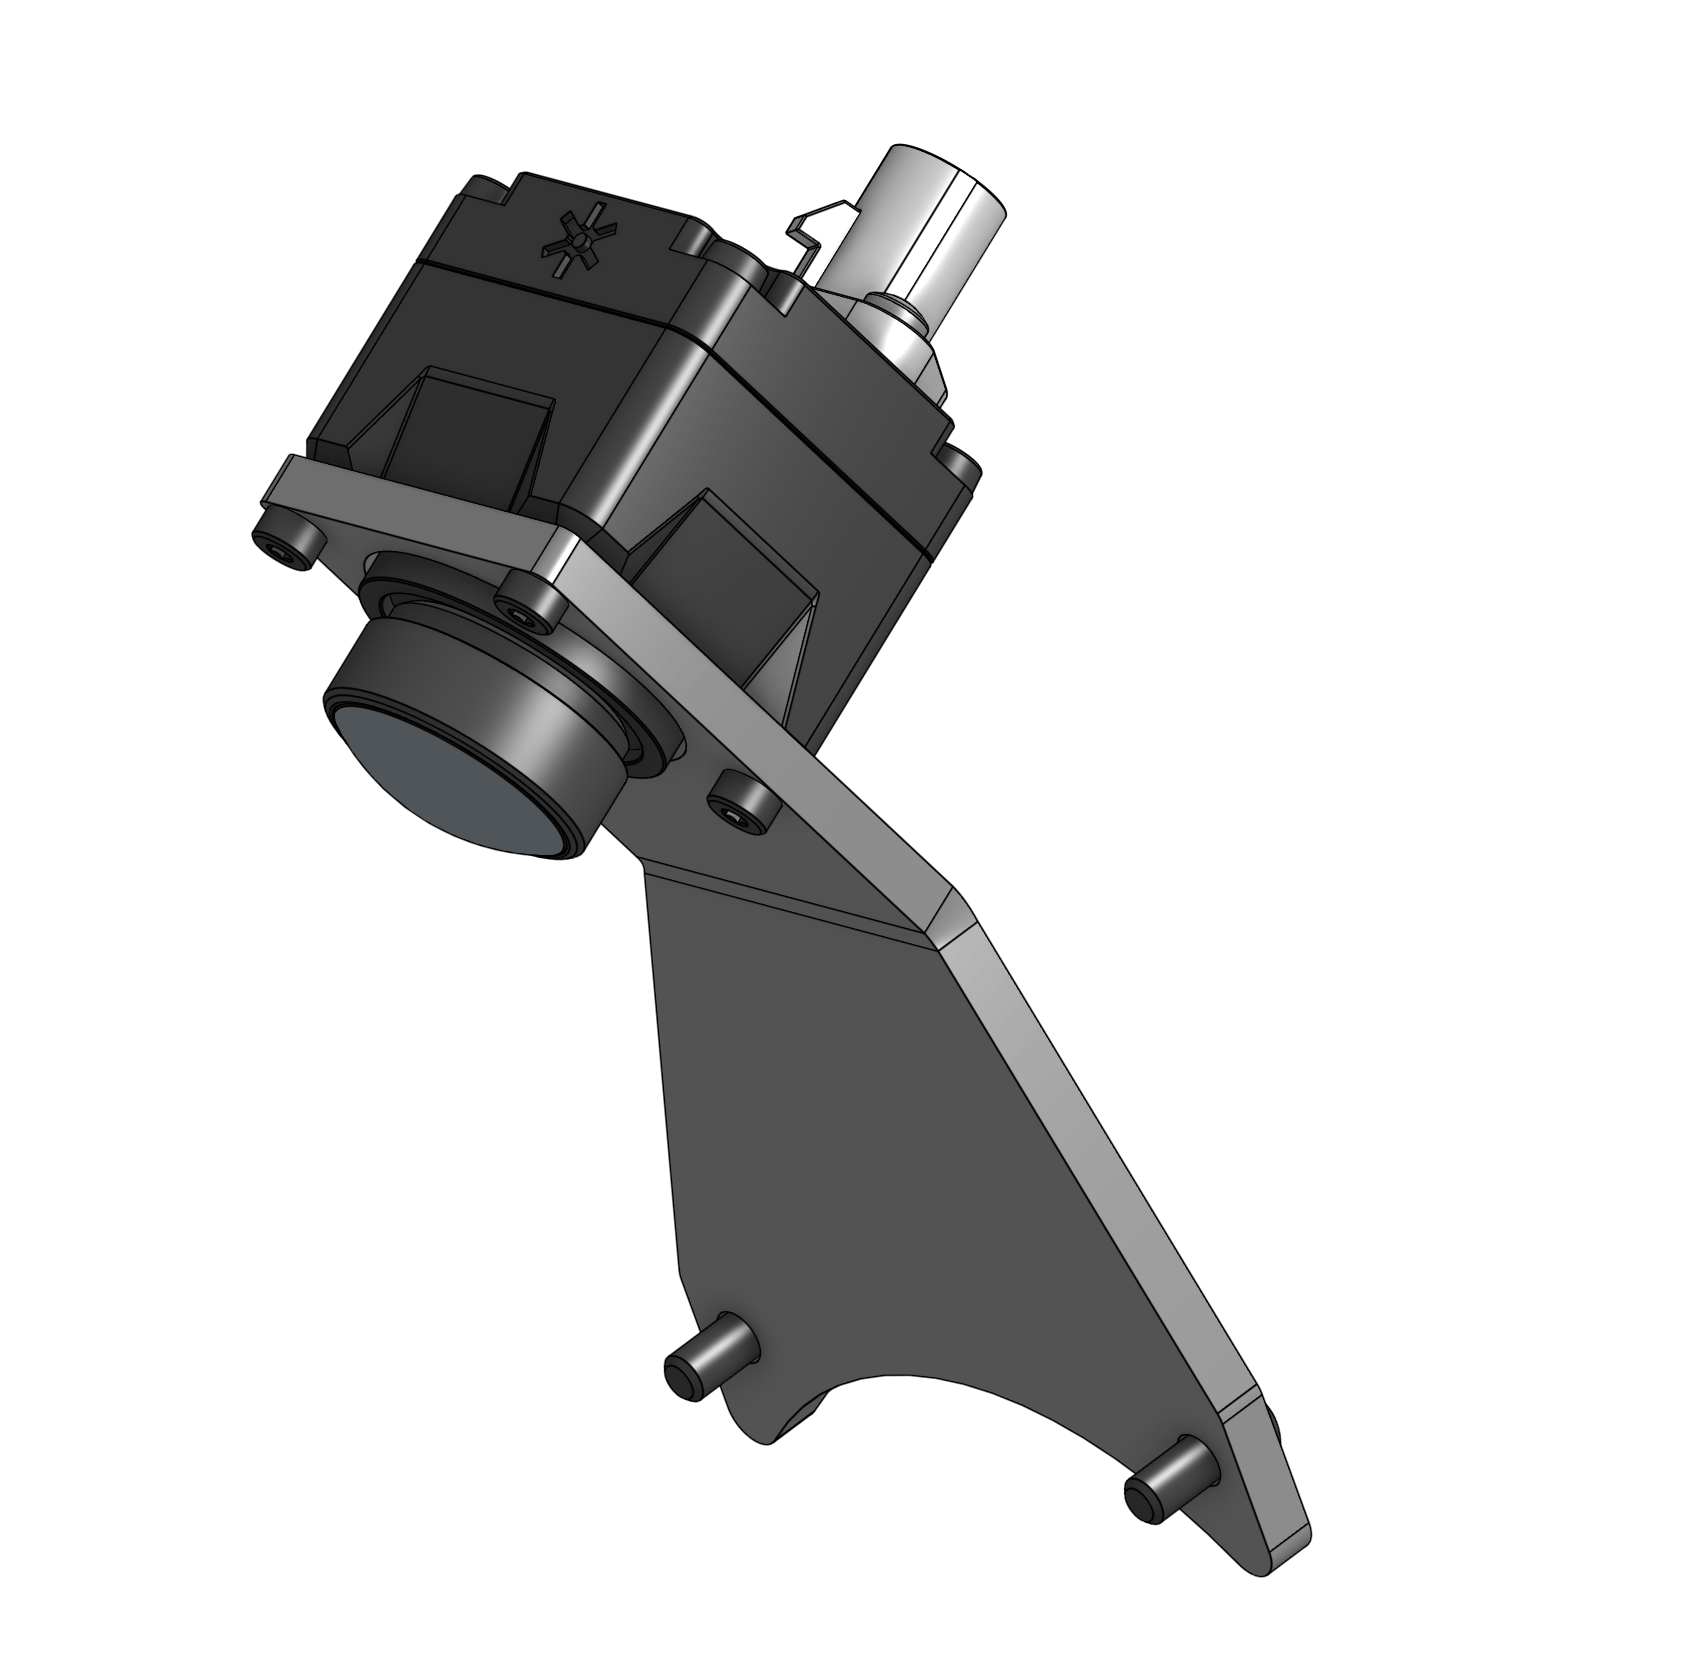 Attach the camera-and-bracket assembly to the wrist with **M3×8 screws**.
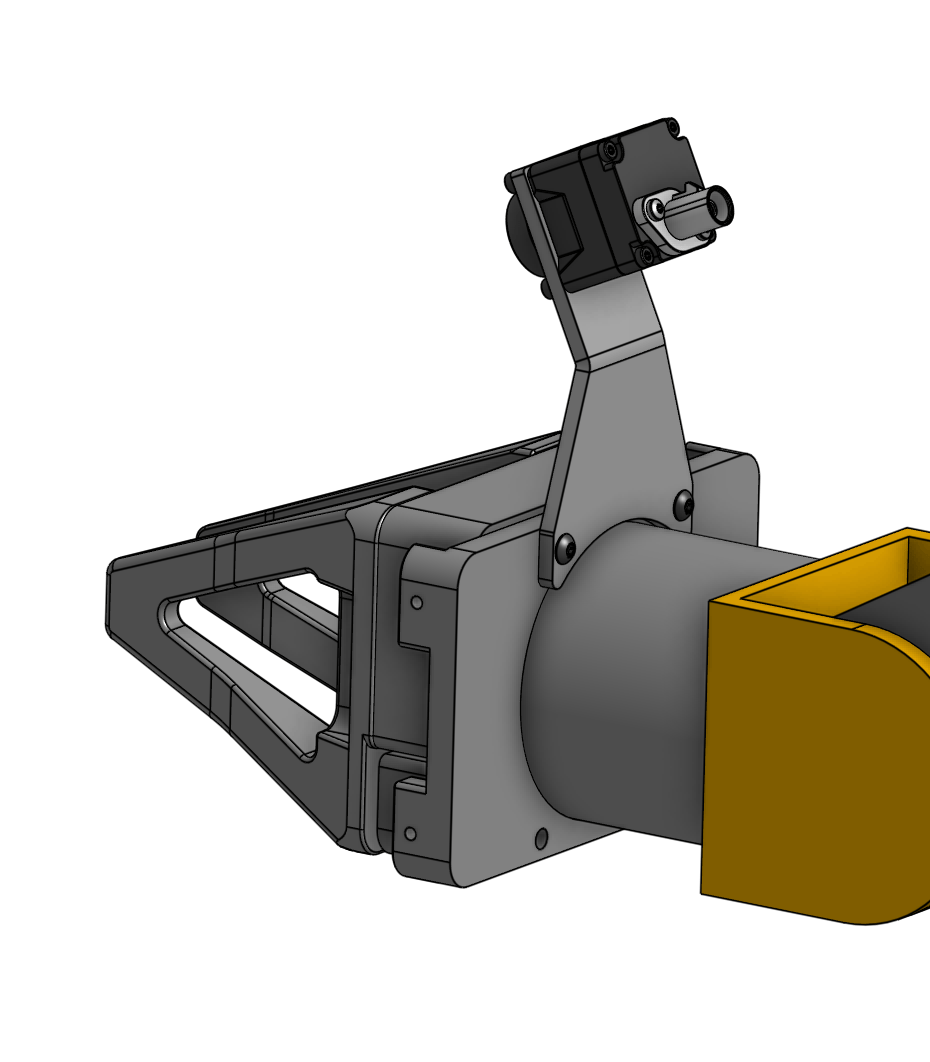 Remove the lens cap from the wrist camera.
#### Head camera
The head camera screws depend on which model your Perception Kit ships with:
* **ZED X Mini** - Use 4x **M4×8 screws**.
* **ZED X One S (ZX1S)** - Use 4x **M2×8 screws** (same as the wrist cameras).
Remove the lens cap from the wrist camera.
#### Head camera
The head camera screws depend on which model your Perception Kit ships with:
* **ZED X Mini** - Use 4x **M4×8 screws**.
* **ZED X One S (ZX1S)** - Use 4x **M2×8 screws** (same as the wrist cameras).
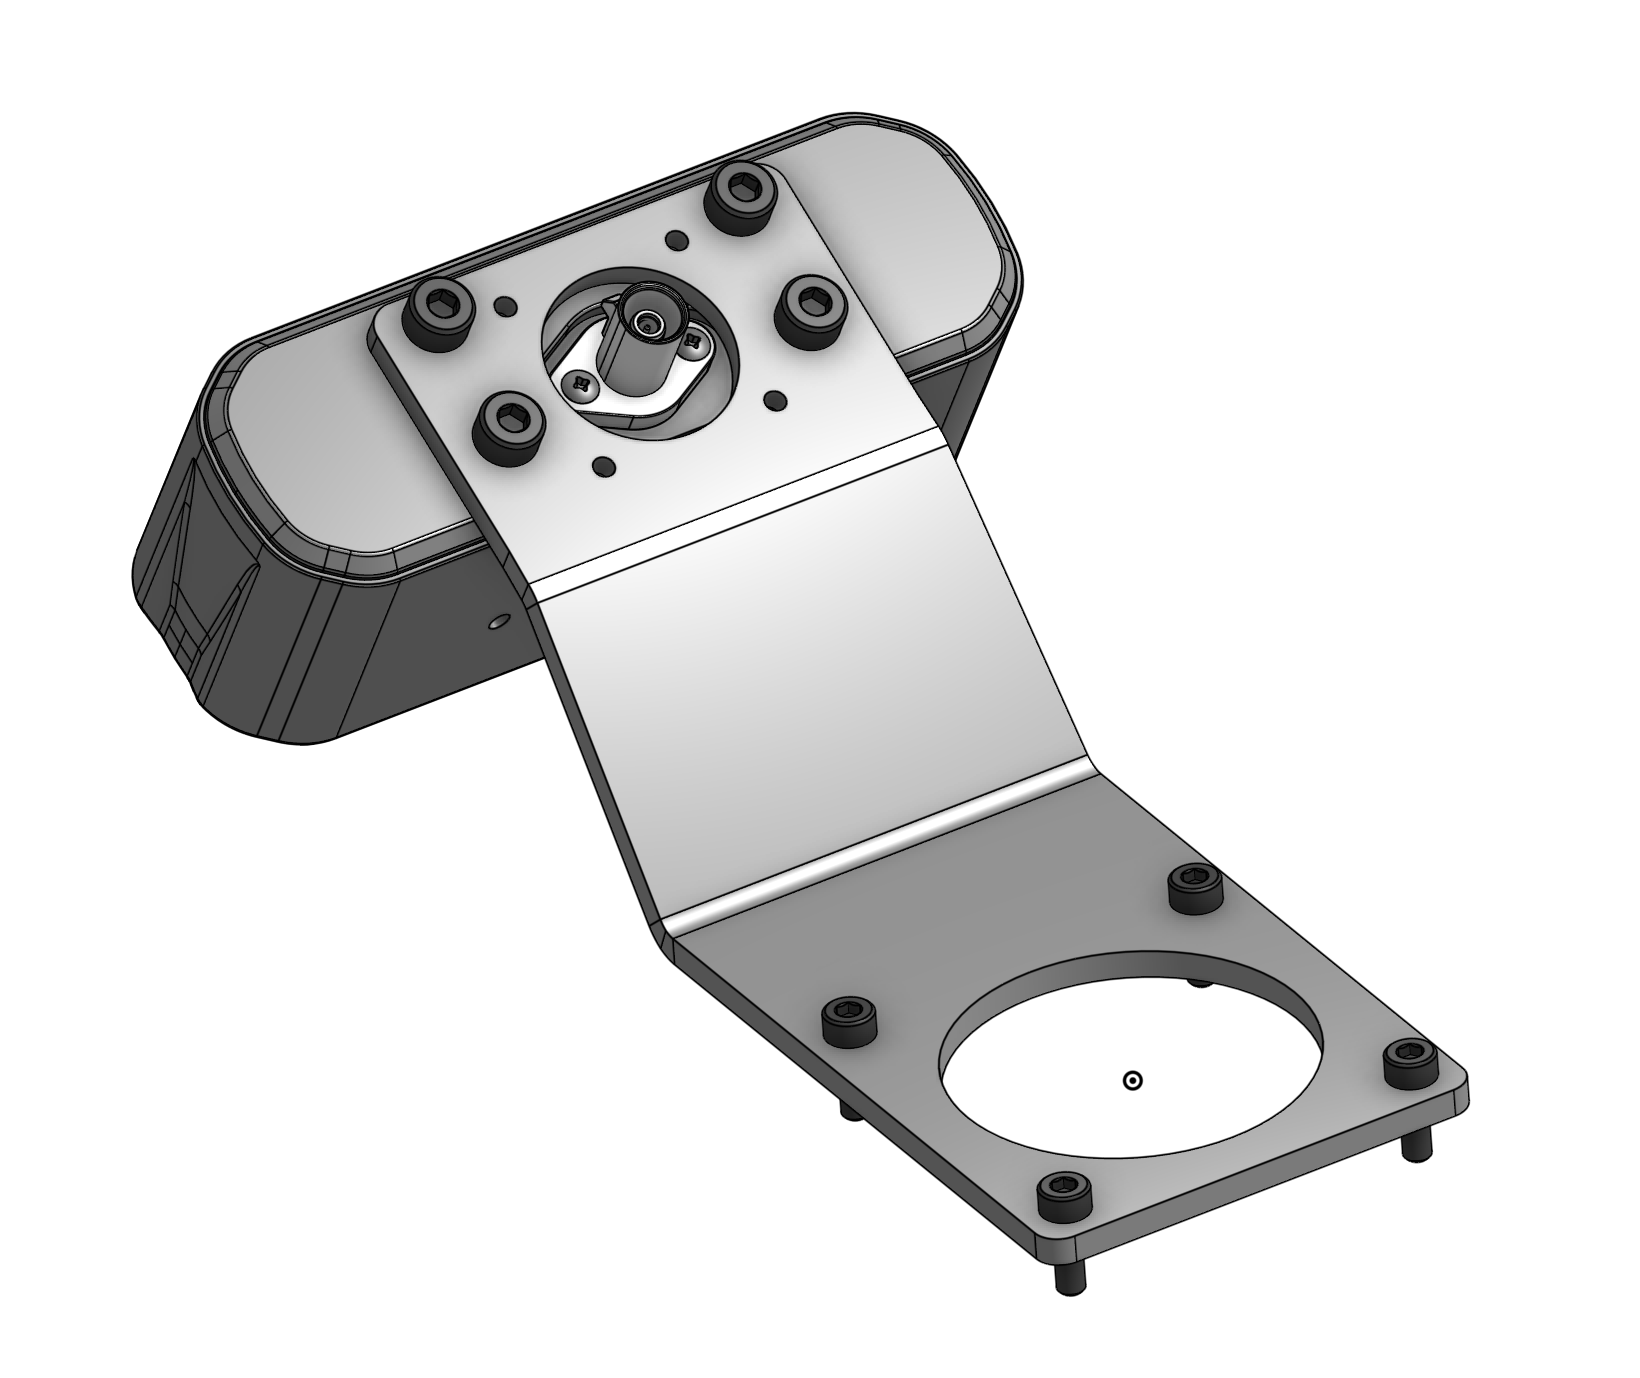 Attach the camera-and-bracket assembly to the head-camera mounting holes on top of Axol with **M4×10 screws**.
If your head camera is the **ZED X One S (ZX1S)**, remove its lens cap.
### Leveling the casters
This section applies to configurations with the **Axol Cart**.
Each caster has a ratchet with a small lever arm that raises or lowers the wheel. To level the cart, flip the ratchet switch up or down on each caster and adjust it until the cart sits level.
### Raising and lowering the robot
This section applies to configurations with the **Axol Cart**.
Adjust the robot's height with the manual lift: insert the crank into the hole at the top of the cart and turn it to raise or lower the robot.
Attach the camera-and-bracket assembly to the head-camera mounting holes on top of Axol with **M4×10 screws**.
If your head camera is the **ZED X One S (ZX1S)**, remove its lens cap.
### Leveling the casters
This section applies to configurations with the **Axol Cart**.
Each caster has a ratchet with a small lever arm that raises or lowers the wheel. To level the cart, flip the ratchet switch up or down on each caster and adjust it until the cart sits level.
### Raising and lowering the robot
This section applies to configurations with the **Axol Cart**.
Adjust the robot's height with the manual lift: insert the crank into the hole at the top of the cart and turn it to raise or lower the robot.
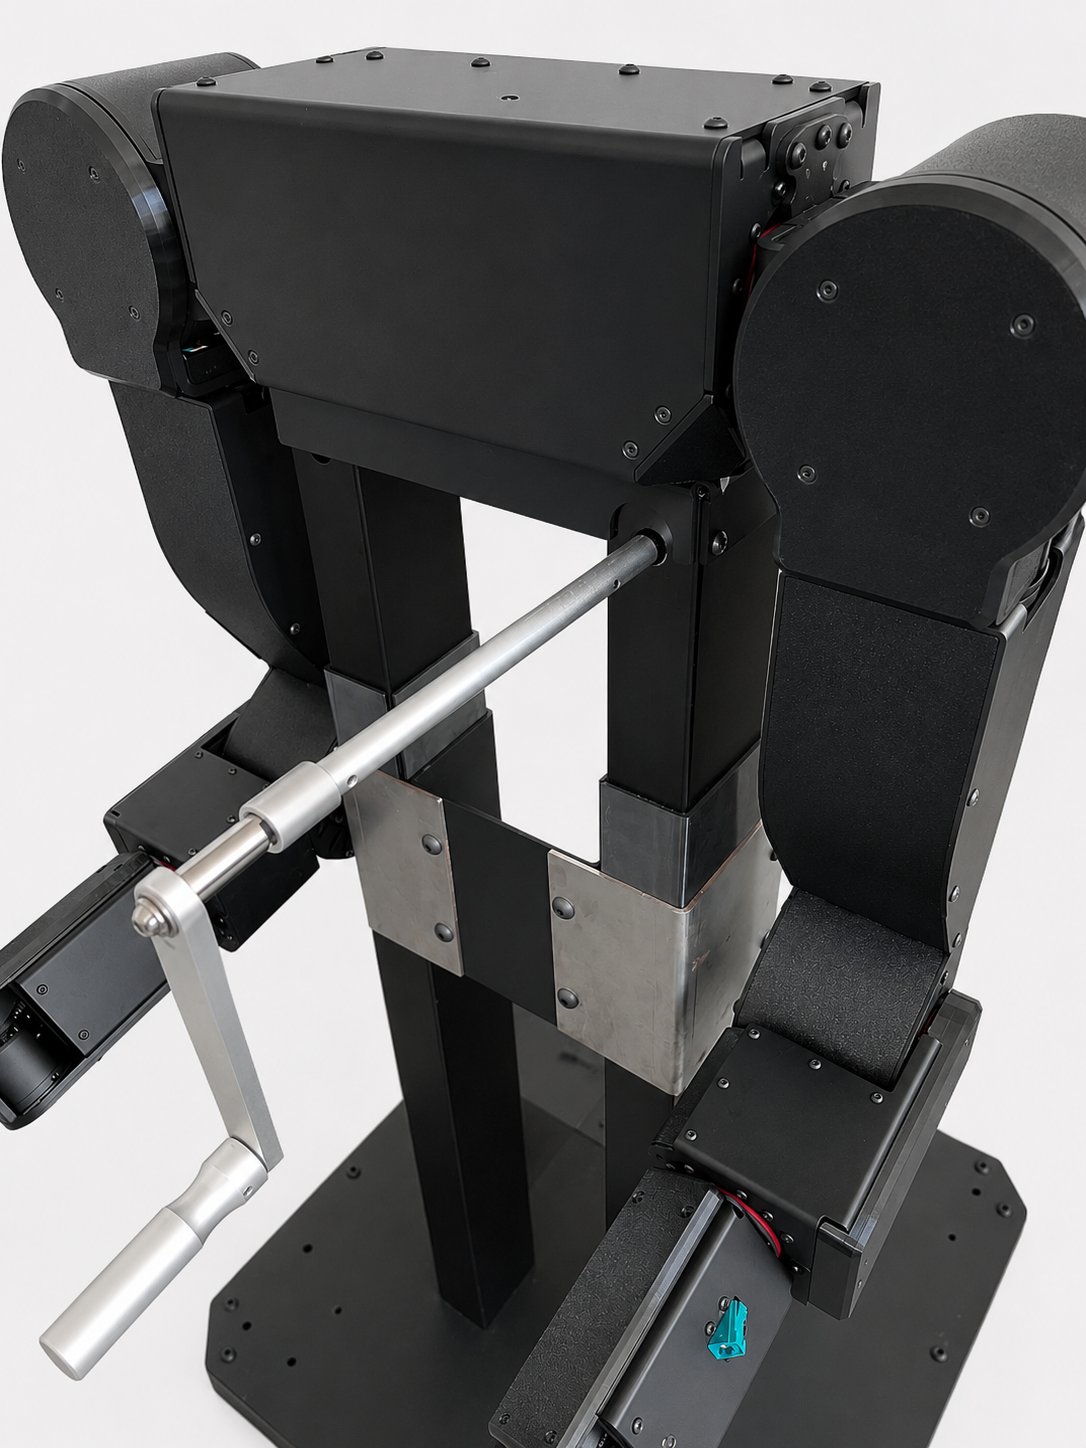 Make sure the crank is inserted **all the way in** before turning it. It's easy to leave it partially seated, which can slip or damage the mechanism.
### Wiring
This section applies to configurations with the **Perception Kit**.
Place the ZED Box and the power supply near the robot (on the cart, if you have one), then connect the cables:
Set the ZED Box and the power supply down so their cables comfortably reach the back of the robot.
Run the head camera's **GMSL** cable from the camera to the ZED Box.
Run the shorter **GMSL** cable from the wrist cameras to the GMSL port on the wrist.
From the back of the robot, run the **power** and **USB** cables to the ZED Box and power supply.
## Next steps
Install Axol on the robot machine and open the web control panel.
Make sure the crank is inserted **all the way in** before turning it. It's easy to leave it partially seated, which can slip or damage the mechanism.
### Wiring
This section applies to configurations with the **Perception Kit**.
Place the ZED Box and the power supply near the robot (on the cart, if you have one), then connect the cables:
Set the ZED Box and the power supply down so their cables comfortably reach the back of the robot.
Run the head camera's **GMSL** cable from the camera to the ZED Box.
Run the shorter **GMSL** cable from the wrist cameras to the GMSL port on the wrist.
From the back of the robot, run the **power** and **USB** cables to the ZED Box and power supply.
## Next steps
Install Axol on the robot machine and open the web control panel.